Top 10 Mozilla’s Designing Tools Suggested by The Best Graphics Designing Company

During the past five years, Google Chrome has been emerged itself as the most used browser for desktop users as well as mobile users. On the other hand, Firefox is preferred normally to the tech-savvy and security conscious alike developers and designers than the average users. Fortunately keeping adherence to web standards, a web browser that is used by most of the developers is compatible with other browsers of most ordinary users. In other words, something that is developed in Firefox will work flawlessly 99% of the time in Chrome and other popular browsers.

Furthermore, the default window browser i.e. Internet Explorer just seems as a fringe browser only to download other browsers for installations. Moving ahead, Firefox can be a great choice for developer and designers. Not just for security and privacy, but also Mozilla Firefox has an abundance of free tools that are much easier to use even from non-free alternatives.

Let’s Discuss Mozilla Tools Used by the Best Graphics Designing Company

Look to these useful, light-weight Firefox tools that may be a great help for the companies providing web designing services, web development, and even at an individual level.

1.Thimble

Primarily, this tool is meant for learning HTML. Being a full-fleshed feature of HTML and CSS editor, Thimble is most used to provide a quick solution. You can directly copy the HTML file from here to upload it to your server. As compared to CPanel’s code editor, it is far better because of empowering some useful features such as doesn’t do annoying ghosting and also not including of apostrophe (‘) in the text as a string delimiter.See the below figure to view the Thimble Interface.

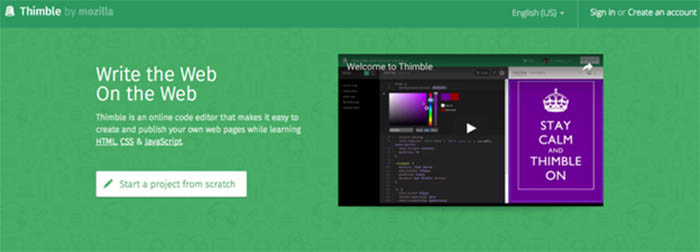
The Thimble interface is divided into two panes as shown in the picture. One is code pane located on the left pane; another is preview pane on the right side. There are three preview modes that are Desktop, Mobile, and Full Screen. Another great feature offered by Thimble is to including the external files easily; even you can create entire trees of folders to store them.

Being an online tool, a major downside of the tool is that you need an active internet connection to run it. Moreover, you should not opt it for publishing your commercial projects as it is not meant for a hosting solution for professionals. Instead, you may copy the required HTML code and paste that into CPanel code editor, and save the result to your own hosting server.

2.X-Ray Goggles

It is an amazing tool offered by Firefox browser. This tool enables you to see how web pages work differently and also allowed editing of the underlying code to make it work differently. See the below image to view its interface.

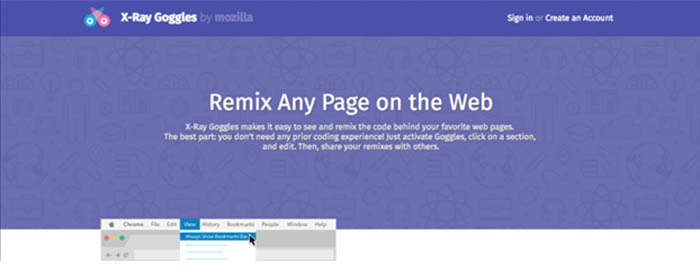
The main use of X-Ray Google is sandbox modeling to test alterations to existing designs and the same should be done without making any permanent changes. You can simply install to drag the X-Ray Goggles button onto the bookmarks toolbar. It can be activated just by clicking a button and turned off by pressing ESC.

3.Webmaker

It is a very good tool for beginners as it enforces a mobile-first designing approach and we know it is essential for modern websites. However, experts may feel crabbed with the limitation of following the mobile-first approach. Obviously, the tool is aiming just to attract teenagers to the Mozilla brand. See the image

Another issue that can arise is that filling up space and resources just like other apps on the mobile devices. Consequently, the tool is not much liked by the expert developers and designers.

4.Editor

This tool is termed as the grand-daddy of Mozilla’s web development tools. Originally, it was called as a composer. The name itself changes it from the Kompozer, which is actually a decedent of the composer. Because they don’t allow the use of HTML5, they are not in use now-a-days. Apparently, you may want to use such tool that supports HTML5 like KompoZer’s half-brother andBlueGriffon. However, you only get a CSS editor while paying for a plug-in. Editor/Composer is included in the Mozilla SeaMonkey browser.

5.Responsive Design Mode

This feature allows the user to test their page layouts at different resolutions from a single desktop screen. Although, it is not perfect in any browser, yet it’s very close or appropriate for most practical scenarios to check the consistency of the site. A responsive mode is activated in Firefox just by pressing Ctrl + Shift + M. To return back to the normal browser repeat the same combination to return to the normal browsing.

6.Web Developer Tools Extension

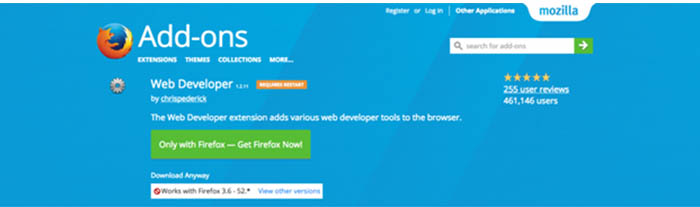
This tool is not enabled directly from Mozilla. It’s a Firefox extensions created by Chris Pederick. By enabling this tool, you can meet a range of needs. See the Image of the interface

Web Developer Tools can be used for –

  • Toggle things on and off
  • Control cookies
  • Tamper with fields in a page
  • Unmask password fields
  • Retrieve in-depth information about images
  • Explore every DOM element in a page in minute detail
  • Outline elements
  • Resize the display
  • View responsive layouts in a better way than the built-in method

and lots of other things…

7.Firefox Developer Tools

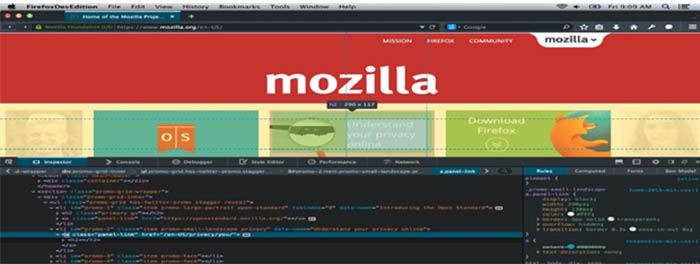
This tool enables the users to use the much of the functionality that was contained in Firebug including a feature of web console. However, the interface provide is not much intuitive. You can learn it by making lots of mistakes. In short, you need to give the time for getting the master and comprehend with every feature of it. See the image of the interface.

Mostly one feature that is missed by most of the users is the JavaScript CLI at the bottom of the console as it is not marked anywhere. Moreover, this feature works better in Firefox than any other browser.

8.MeasureIT Extensions

This tool allows you to use the features measuring of both height and width simultaneously. It can perform better as compared to the screen ruler. This features offers you to measure everything in a browser window itself. Though, some users reported that it is not working in some versions of Firefox. It may be due to conflicts with other extensions. Anyhow, you may use the feature by disabling other extensions once.

9.Colorzila Extensions and Eyedroper

Both or either of these tools is a must for designers as these tools offer to find a colour of any pixel in the browser in very short time. Despite the fact that you can also use Gcolor, which is a Gnome tool and behave exactly same including the advantage of being able to sample a colour from any window, not just the browser. Colorzila and eyedropper are better because of showing a zoomed view of the pixel, from where you are fetching the colour.

10.Scratchpad

This tool allows you the facility of writing and testing the chunks of JavaScript. Unlike the console, you can execute any number of lines of code at a time as you want. You can activate in any Firefox tab just by pressing Shift and F4 together.

Being a web developer or web designer, they are responsible for executing their job timely whether know these tools or not. Anyhow, these tools help anyone to make the task easier if used precisely. Prior knowledge of these tools just helps them to do the job more perfectly. Furthermore, these tools are free and knowing these tools may also help you to resort them for future use in case not required in present.

Enjoy these free Mozilla tools from today…….

For any sort of designing requirements from the best graphics designing company, you can write us at Lunatic Devs. We are committed to the best quality work at the most competitive price in the industry.

For details, please write us at lunaticdevs@gmail.com

Stay tuned to our Facebook, LinkedIn, Instagram, WhatsApp, and Google Page.

How to Build a Powerful and Automated Content Calendar – Part 2?

In the part 1 of this article, we have read some quick tips to create an automated content calendar. Part-2 will be all about creating a fully functional content calendar. Similar kind of according to use and requirements are created or recommended by the best SEO Company in India. 

Let’s dig deeper how to create it:

1.It is the duty of Project Manager to list down the type of content that they like to produce by their content team. Or, I would say follow a campaign-based approach for all of your planned activities. Create different worksheet for each of your campaign in a spreadsheet. Below are some examples of the content pieces or campaigns that you may want to write-on in your calendar:

  • Blogs [Stories around proprietary/exceptionally exciting features, data driven stories, listicle, and leader boards etc.]
  • Case Studies
  • EBooks
  • Event driven stories [Stories around events in your industry, stories around events like commemorative days, sporting events, festivals etc.]

Getting start with creating a separate worksheet for each campaign, be it blogs, case studies, eBooks and so on.

2.Under each of these campaign worksheets, create the following columns:

  • Content type, campaign name, content title, publish date, trigger date [this is a date you’d want your content marketer to start working on a particular content piece] days to prepare [this is the time a content marketer and the design team would take to generate content, create design and review the final content piece], approver, owner, calendar event created and published date

Please note that column name is used an indication purpose. You can add or reduce column name based on your requirements. Consider this screenshot to get a better understanding.

Now look at the columns Calendar event created and Unique id, I’ll discuss that in coming sections of this article. Also, will discuss how the trigger date is calculated with the help of simple formula. Moving on, create separate spreadsheet with similar format for each campaign and fill out the details in each column.

3.Automating reminders to each content owner and mapping these stories to your company calendar:

If you think each content marketer remember the date & time when they need to publish the content, it seems quite unrealistic. As campaign grows, it becomes difficult to manage all. Hence automating reminders and mapping these stories on your Google calendar is extremely necessary, for all stakeholders to be able to view it on a calendar, rather than having to open a google spreadsheet each time [we all know how hard it gets to remember the name of each spreadsheet, so reduce the pain and map it to a company calendar]. So, you can do this small activity that will take your hardly 10 minutes

  • Install an add-on: ‘Add-reminders’ in your Google Spreadsheets to setup the reminder in the following manner
  • Map the deadline column to the Execution date, trigger date or published date what you want
  • Send reminders hours before/after the trigger date.
  • Choose the Owner ID under the notify people options and customize your email body under ‘customize the emails sent’ option.

This will work to send remainders to each content owners before the content is to go live. For each campaign sheet you need to set different remainders. However, it may be an extra task but it will be helpful.

Note: You can write a script with the help of your Developer to automate it or take the help of best SEO Company in India who provides integrated solution.

There are a bunch of other views that can be created to organize your content calendar, again as used/ suggested by the best SEO Company in India. Write to me on lunaticdevs@gmail.com   for any questions, Creative Content Writer at Lunatic Devs – I love to discuss my experience of this organized calendar.  Setup time with me here for a quick 30 minutes’ chat.

Furthermore, if you are looking the best SEO Company in India, please contact us at Lunatic Devs. We always believe on quality and strict to deadlines.

If you like our piece of content, please subscribe our blog, like us on Facebook, follow us on LinkedIn and Instagram, and message us on WhatsApp.  

Happy learning!

Let’s Know Joomla Installation and Login Steps for Ecommerce Website Development in India

Are you looking an easy to use content management system for your ecommerce website development? Joomla is an open and free content management system tool which is primarily for ecommerce website development in India. You can easily track the website content such as text, photos, music, video, documents, or anything just like library management system keep track of books.

You don’t require much technical knowledge to manage your ecommerce website through Joomla development. Apart from ecommerce website development in India, Joomla development is also used in the follow applications:

– Corporate portals and website

– Industry intranets and extranets

– Online newspaper, magazine and publications

– Online reservation systems

– Ecommerce business

– Small industry website

– Govt. applications

– School and church websites

– Personal or family page

Steps to install Joomla on server for ecommerce website development in India:

1.Download the latest version Joomla 3 complete installation package: Firstly, download the Complete Joomla package from official website joomla.org and extract it to new folder on your hard disk.

2.Upload Joomla file on server: After extracting the package, upload the Joomla file on server via FTP. To access Joomla through main domain upload the file in public_html folder else upload it in desired subdirectory i.e. ( public_html/joomla/).

3.Create MySql Database for Joomla: After uploading the file on server, we need to create mysql database with full permission.

4.Go through the installation: Now open the browser and navigate to main domain or sub domain where the installation is performed. Add the necessary information along with administrative username.

Steps to login in Joomla:

To login with Joomla administrative panel, we need to open web browser and navigate to

http://mydomain.com/administrator. It will open login page where we need to enter the credential which we have chosen during Joomla 3 installation.

Steps to reset password:

Joomla admin tool is used to perform different management tasks which are located in c panel. To reset the password, first we need to login in cPanel and navigate to joomla admin tools under Joomla tools tab.

After this we need to locate the site and click on Reset Password link next to it.

This will open change password page where we need to enter admin username for the website and reset new password for it.

Finally, click on Change Password button and enter the new password.

After getting the above task done, you can create your ecommerce website as per the requirements. However, we should keep in mind that Joomla version is always up to date as it is necessary for the website security. Once your ecommerce website is ready, it’s necessary to keep the backup of Joomla website to protect it from malfunction of extension, hacking of site.

For your advanced functionality ecommerce website requirements, please contact us at Lunatic Devs. We offer you the best ecommerce website development in India at affordable price.

For details, please write us your query on lunaticdevs@gmail.com Stay tuned to our Facebook, LinkedIn, Instagram, WhatsApp, and Google Page.

Creativity is the Soul of Graphics Web Design. Don’t Lose It

A website design is the first thing which influences the visitors and insists them to continue browsing. Responsive web design made this browsing experience more enjoyable. The feature of responsiveness facilitates to surf the internet sites on various screen size regarding their type. Graphics designing has the capacity to convert the plain text into beautiful post, and clutters of unconnected JPGs to professional portfolio. It all depends on the creativeness of Graphics designers. Creativity is the soul of Graphics web design. All you have to do hire some professional and best graphics designing company.

A good graphics web design can offer you:

Today internet is aesthetically beautiful places which are a source of simple, attractive and beautiful sites that are built on solid grid layouts by the best graphics designing company. The wild west of the web has been tamed. Introducing creativity and responsiveness in graphics web design can offer you plenty of benefits:

  • Easy Navigation for user (if done correctly)
  • Relatively fast and easy prototyping
  • Heavy standardization of site-building techniques
  • Fast layout needs to big cost saving

Without Creativity Graphics Designing are just a pool of cluttered or patterned images:

As the technology is growing, average professional website today seems like a pool of similar kind of images without any meaning or creativeness. Although, it may look good at first site but when we research deeply we found that everything on the web is looking same. Maybe the designers has lost the pioneer spirit and sacrificed their creativity. Below are the few factors which cause the lack of creativity in web design today:

  • Layout: Designers use the limited layout and ideas for web design which is one of the prominent and obvious reasons that all sites look similar type. There are few basic layouts which rule the web like – strip out colours, animations, and parallax scrolling effects. Very less number of sites is different from these layouts.
  • Responsive Web Designs: Today it is the necessity to prepare a responsive web design. Basic, fluid-width, collapsing grids make responsive web design a much simpler process than more organic layouts.
  • Frameworks: To speed up both design and development workflows, web design framework is the basic need but the drawback is that almost all designers use the exact same codebase, layouts and even aesthetic style on every project.

Apart from above some other factors which also give the illusion of similar site:

  • Prototyping tools and processes
  • High Quality free photos and graphics
  • Design trends

At this point, Graphics designers already decide that whether they will deliver a creative and unique web design or not. However, you can hire the best Graphics web designing company like Lunatic Dev to see creativity in your web designing work.

For details, please write us your query on lunaticdevs@gmail.com Stay tuned to our Facebook, LinkedIn, Instagram, WhatsApp, and Google Page.

How to Build a Powerful and Automated Content Calendar – Part 1?

As a marketer you would relate that a solid, stabilized content marketing plans as a part of digital marketing services is vital for a brand’s online digital marketing success. It is also equally important to follow it consistently the way it planned to see the desired outcome.

But more than 80% marketers and content strategist feel stressed to handle planning, creation and execution of the content in an orderly manner. And the situation gets more difficult when new tasks get added up and they overlap the earlier ones, increasing the chances of you missing regular posting schedule. Ultimately your digital marketing services will result drop in your brand’s metrics, and a loss of effort from previous work.

Since there are too many channels to plan and publish your content over digital media and content marketing is all about consistency, there need to be some checks in place so that your content manager doesn’t miss out on anything.

Let’s understand this with a simple situation:

Any idea about what your content team is going to post, share, and blogging in the coming week? How about next month, next year? Over the years, one challenge is being organized and disciplined in my professional life. For me being disciplined means organizing the content that is produced daily, weekly, monthly and getting transparent with necessary stakeholders. To give you an example, if a company works with a central design team, it is the responsibility of the content team to update the design team ahead of time.

Understanding the importance of this scenario, I planned to do work on building a powerful content calendar and making it easily available so that you will never miss an update. In this post, you will find some quick tips to create a functioning content calendar example that will help you to plan out your things. It will also help you understand what I am talking about.

To know all fully functional steps, you have to wait for Part-2 of this article and believe me you will enjoy those steps

Quick tips

How to setup a new calendar and grab a calendar ID

  • In Google Calendar, go to My calendars -> Create new calendar.
  • Name the calendar whatever you want (we named ours “Content Stories”).
  • Share the calendar with everyone in your organization. Managers should be able to Make changes AND manage sharing whereas employees should just be able to See all event details.
  • Click Create Calendar. Your calendar should now appear under My Calendars.
  • Click the drop-down next to the calendar and select Calendar settings.
  • Under the Calendar address section find the Calendar ID.
  • Now set up the calendar the way you want based on your organization’s requirements.

Note: You can write a script with the help of your Developer to automate it.

If you want to know any other information regarding the topic, write to me on lunaticdevs@gmail.com  for any questions, Creative Content Writer at Lunatic Devs – I love to discuss my experience of this organized calendar.  Setup time with me here for a quick 30 minutes’ chat.

If you like our piece of content, please subscribe our blog, like us on Facebook, follow us on LinkedIn and Instagram, and message us on WhatsApp.  

Stay tuned to the Part-2. Happy learning!